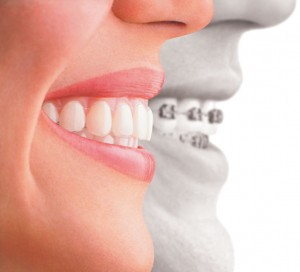
 Every patient who gets braces spends a lot of time imagining what their new smile will look like when they are finally off. The “after” element is perhaps the most crucial part of orthodontia, and it’s something that you should certainly take into account with your marketing materials. With the content and the images you distribute in your marketing materials, do you help prospective patients visualize what their smile will be like after completing orthodontic treatment?
Before and after pictures are always an included part of patient files and records but have you considered how they might be able to improve your dental marketing materials as well? Having high-quality before-and-after pictures of real patients (instead of the mugshot style photos that are so common in the industry) and their beautiful smiles makes the end result much more reasonable and seem within reach for patients who are considering treatment.
To really get the maximum results from including these images in your marketing materials like your website, social media, or even direct mail postcards, it’s important that they capture your patients in the best way possible. Yes, their smiles may look great in just a typical photo. But any patient who will agree to allow you to share their “after” photo in marketing materials would want to feel like they look their best overall, not just their teeth.
Here are a few tips to take better before after photos of your patients that will have maximum impact for your marketing materials:
Invest in a Decent Camera for Your Practice
Using a standard point-and-shoot camera is fine if you will only be using the photos for patient files and records. The fact is, though, that these cameras typically don’t produce the absolute best images that portray patients in an impressive way. Investing just a few hundred dollars in a basic DSLR camera can significantly improve the quality of your photos—even if it is just used on an automatic setting.
Create a Designated Photo Area
Taking high quality before and after photos should involve more than just having your patient stand next to a blank wall in your office. Since it’s likely that you take these photos of every patient you work with, it’s wise to create a designated area in a separate room in the office just for taking photos. This way you can justify having the proper equipment set up and available each time you need it to make the process quick and efficient.
Ditch the Blue Background
When it comes to backgrounds, it seems to be a continuing trend for orthodontists to use green or blue hues in photo backgrounds. This is rarely the most flattering option for patients. Instead, choose a more neutral background like soft white or warm beige that will compliment most skin tones. If you don’t have an actual studio back drop, make sure whatever material you have placed behind the patient is non-reflective and non-textured.
Don’t Ignore Lighting
Lighting is essential for any high-quality photo. If you’ve been taking before and after photos in a room with florescent overhead lighting, you’re probably not capturing your patients at their best. If there is a room in your practice that has large windows and consistent light during the day, taking advantage of this natural lighting can be one of the best options to capture great images of your patients. If not, you can find inexpensive products online to improve the lighting in your photos, such as reflector screens, an umbrella diffuser, or soft box. Your office staff doesn’t have to be professional photographers to use these tools, either. Simply reviewing a few basic online tutorials can give them the skills they need to use them properly. Good lighting can make all the difference between an average “after” photo and an outstanding one.
With the right tools, setup, and basic skills, your office can produce stunning “after” pictures of your patients that will be a great addition to your marketing, but also something that patients will be proud to have and share on social media, which can be another great marketing bonus of these photos. Don’t limit your marketing images to stock photos only. Help prospective patients visualize how great it will be to have beautiful smiles by showing how you’ve helped real patients do the same. Contact us to learn how you can make the most of your new and improved patient photos by incorporating them in our proven direct mail postcard designs!
